How to manage your VPS with SolusVM
1. How to change the server status:
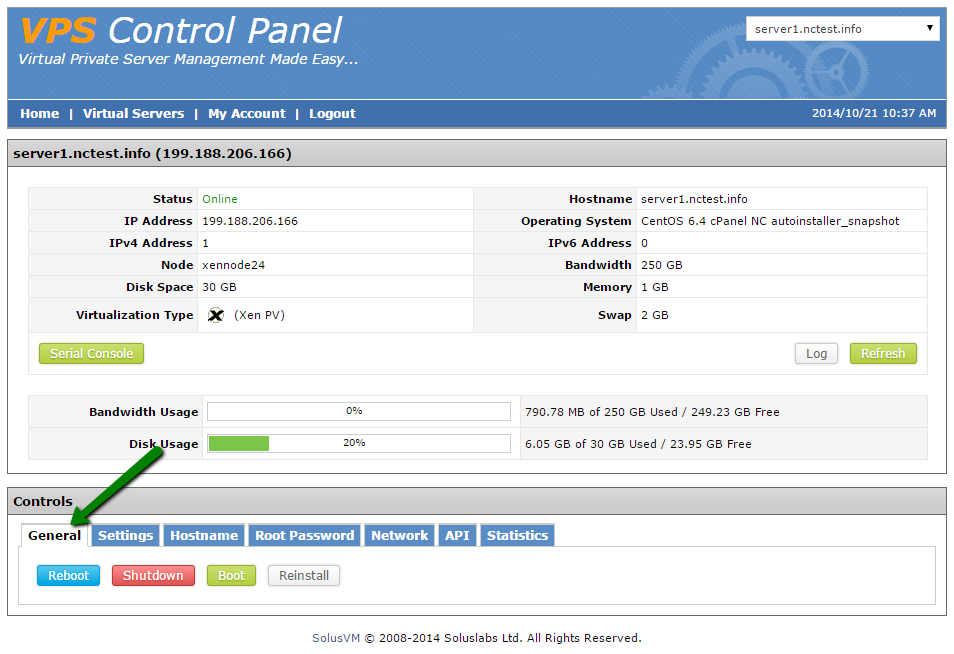
To change the server status, select the General tab:
- Reboot - reboots your VPS; may be needed if VPS has stopped responding
- Shutdown - turns off your VPS server
- Boot - turns on your VPS server
- Reinstall - reinstalls OS on your VPS
NOTE: The reinstall option will erase all existing data on your VPS
2. How to change VPS hostname:
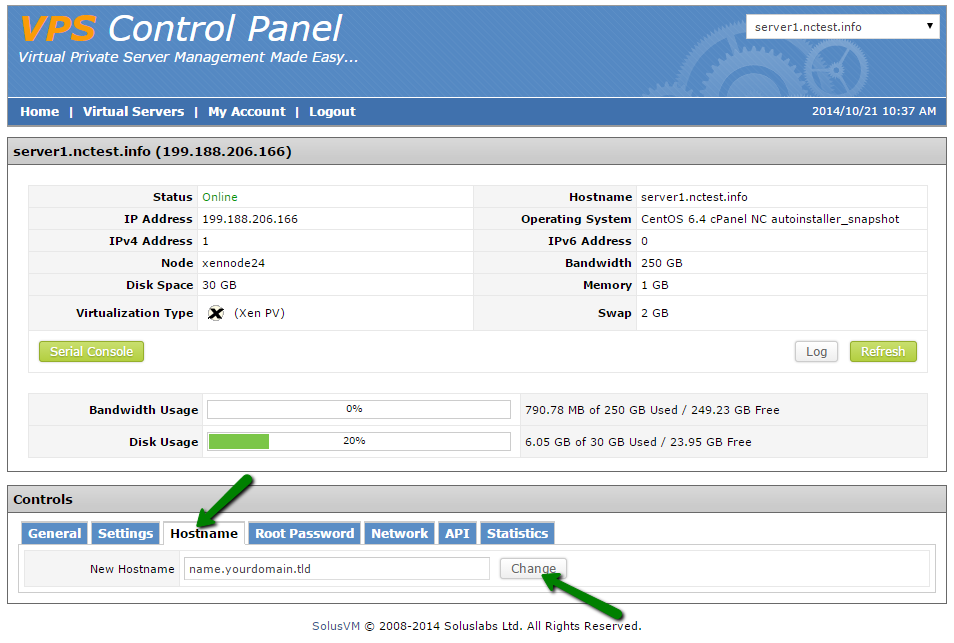
- Select the Hostname tab
- In the New Hostname field input the new server hostname of your choosing and click Change.
NOTE: The new hostname must be set in the following format - newname.yourdomain.tld
3. How to change the root password:
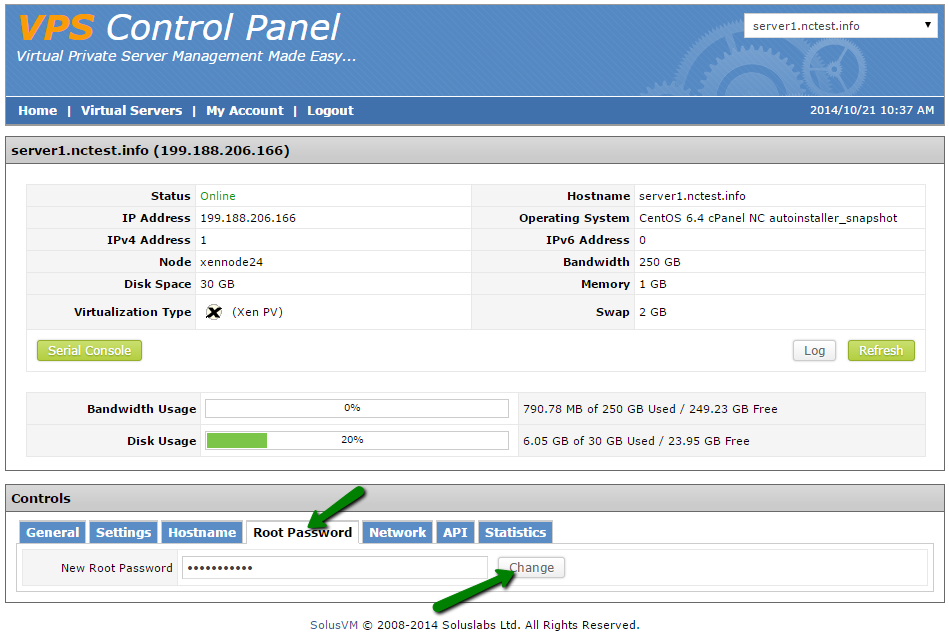
- Select the Root Password tab
- In the New Root Password field input the new root password and click Change.
NOTE: A reboot of your VPS is required for the root password change to take effect.
4. How to enable API access to the server
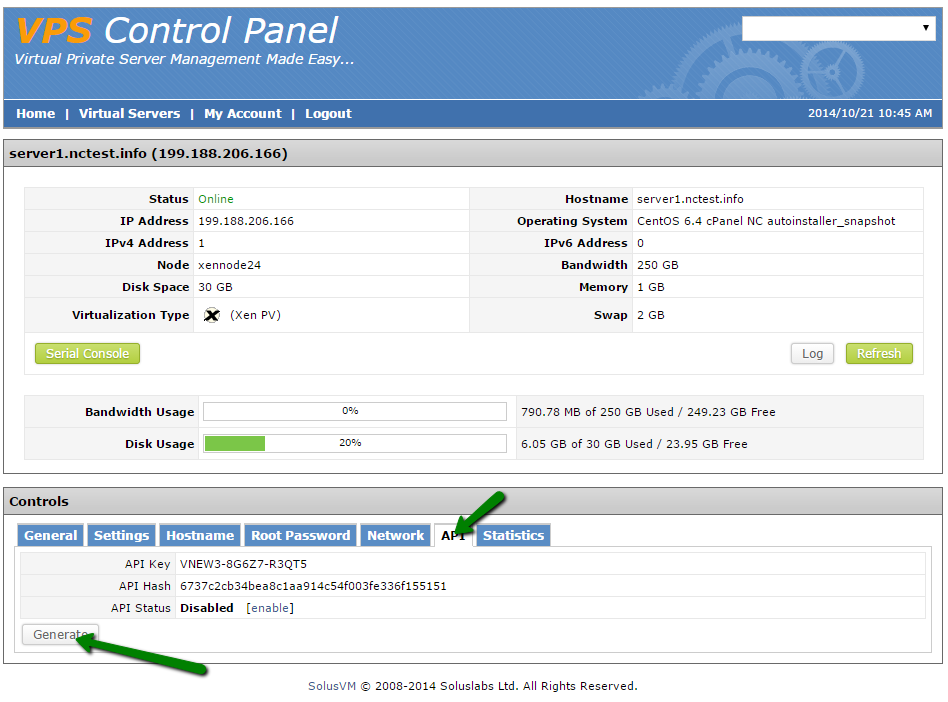
- Select the API tab
- Click on Generate in order to generate a new pair of API user/password.
5. How to check VPS usage statistics
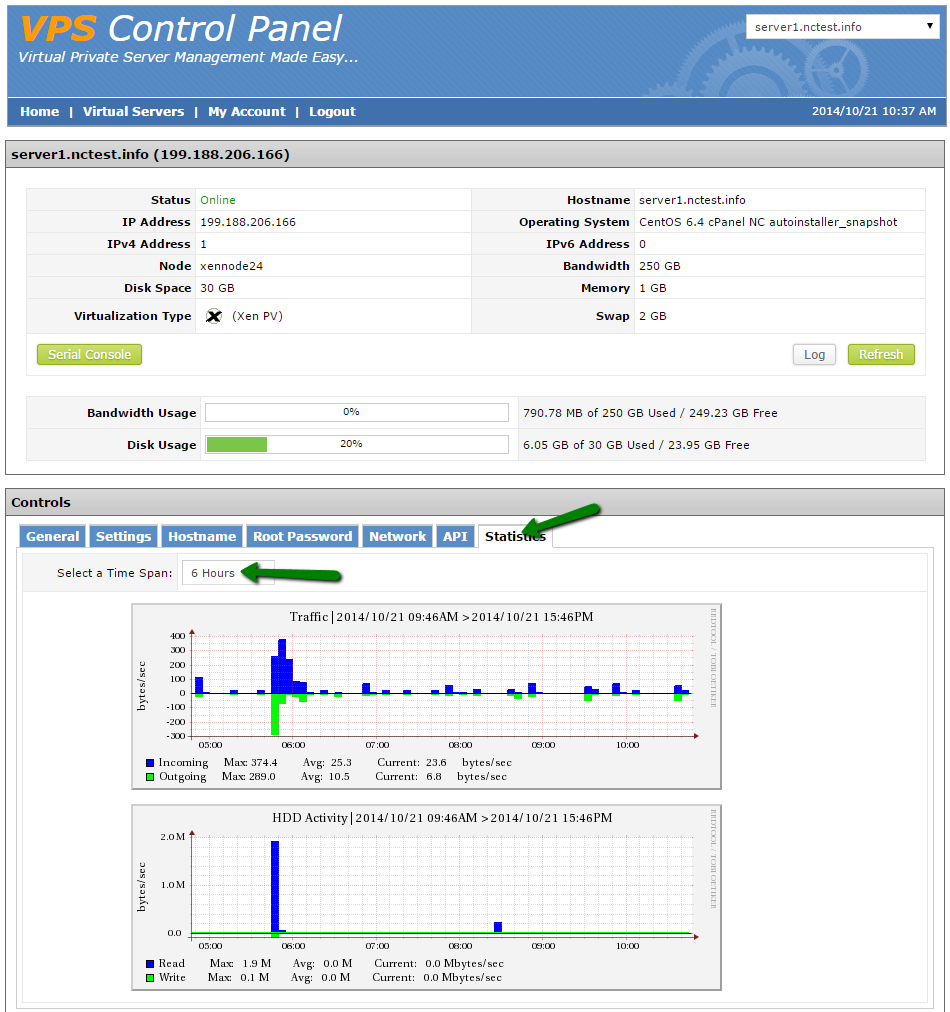
In the Controls section select the Statistics tab and a time period from the drop-down list to see Traffic and Disk Space usage log:
6. How to access server via Serial Console
Serial Console is a SolusVM feature that enables an SSH connection via a separate IP address using session-specific random login details. It can be used when you can’t connect to your VPS via regular means, for example, due to a firewall misconfiguration:
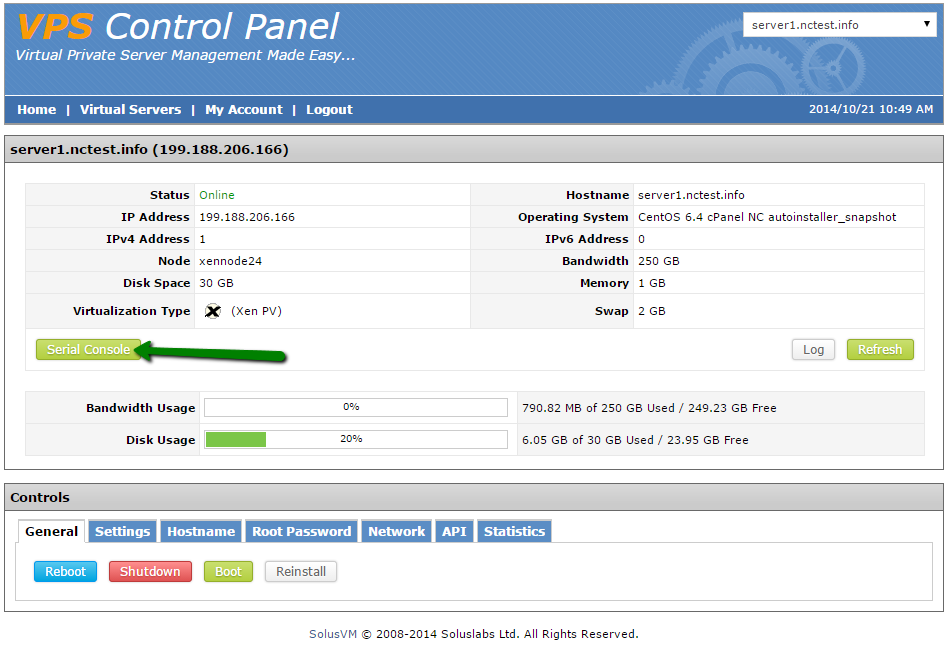
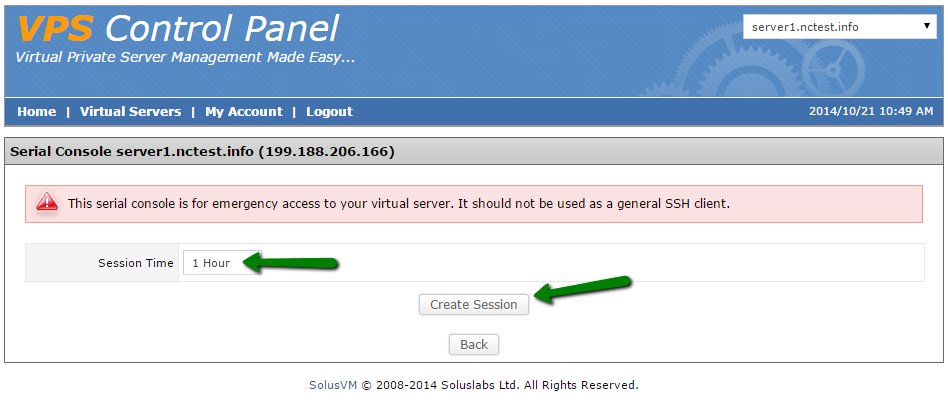
- To access this feature, click on the Serial Console button
- On the next page, select the time period access will be granted for and click Create Session:
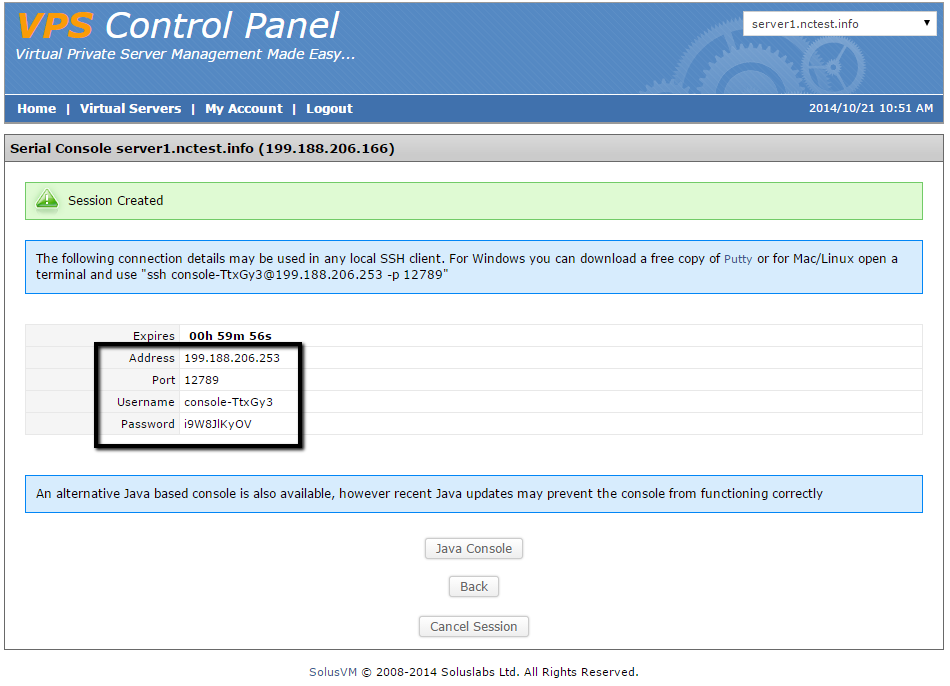
- On the next page, you will be provided with SSH access details which can be used in any SSH client (or use Java console on the same page)
