Change The RDP Port in Windows 2012
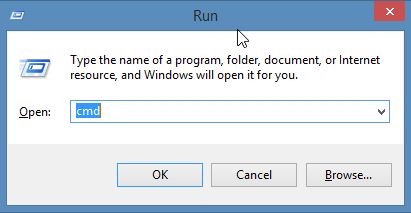
On your keyboard hold down the Windows logo + R buttons which opens the “Run” dialog and execute the “cmd” command and click OK
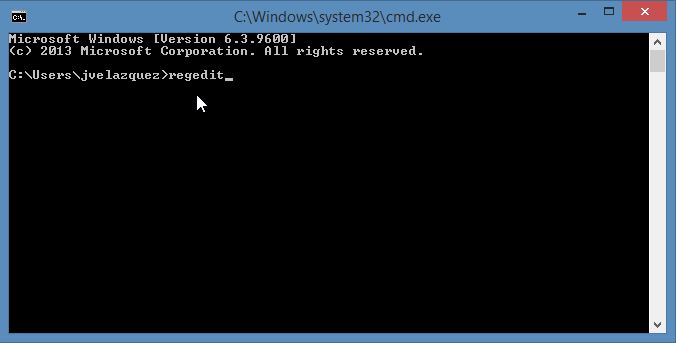
Type “regedit” and click enter
HKEY_LOCAL_MACHINE\System\CurrentControlSet\Control\TerminalServer\WinStations\RDP-Tcp\PortNumber
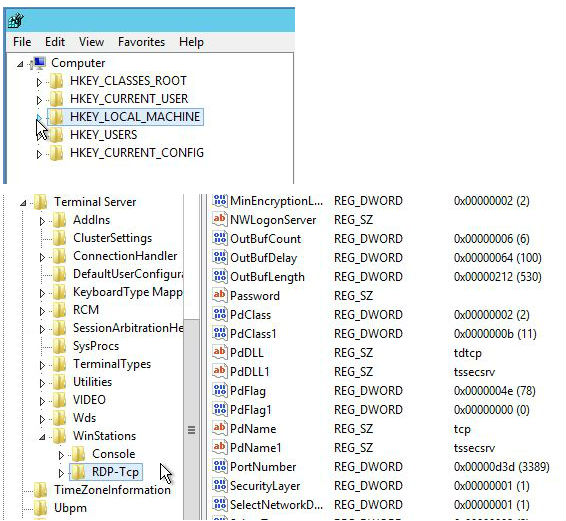
This is the registry path to change the RDP Port in Windows 2012
Find the “PortNumber” registry subkey and either right-click or double-click it. A box should pop that says “edit DWORD.” Find the value data (it should say 3389 for standard installations) and change it to the port that you would like. In this example, we chose port 1050.

This is the Port value field in the Windows Server 2012 Registry
Exit the registry editor
After that run fire wall
custom firewall port “Adding a custom firewall rule.”
Adding a Custom Firewall Rule
Open Server Manager/ Click on Tools/ Select Windows Firewall with Advance Security/ Select Inbound Rules and click New Rule under actions.Select

Click new rule
Select Custom from the Rule Type radial button and click Next.
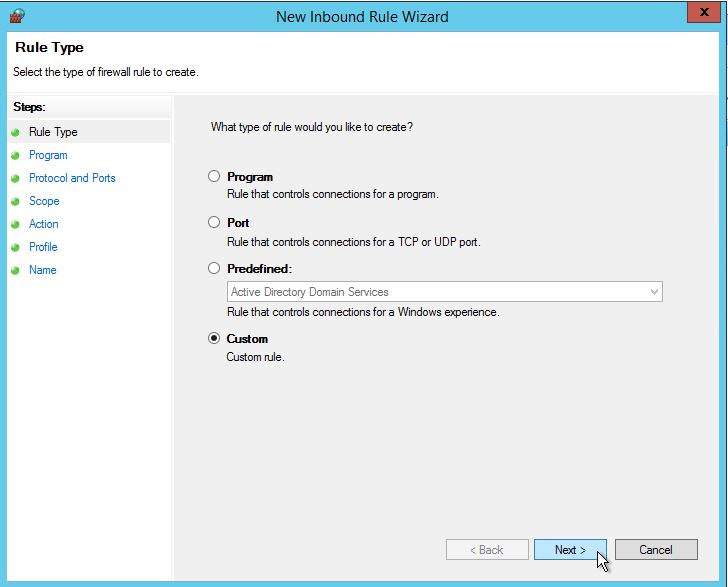
Click Custom
Select the Program Association for the Custom Firewall Rule either All programs or the path to a program and click Next.
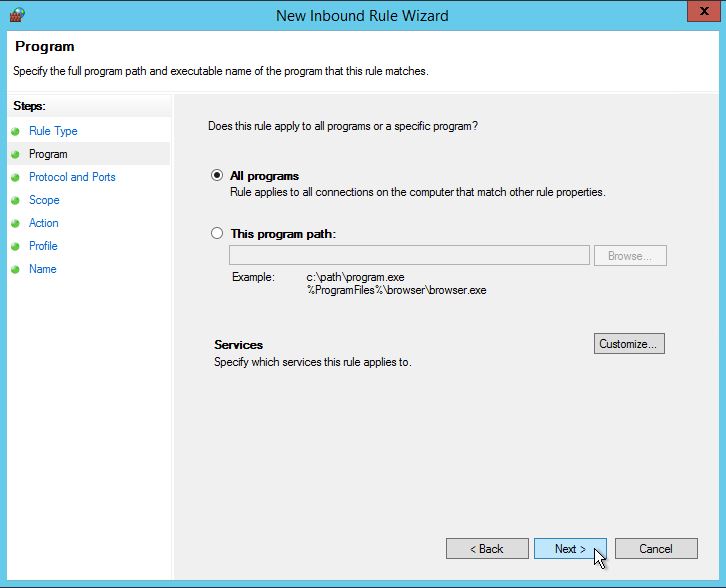
Choose All Programs
Select TCP for Protocol type/ Select Specific Ports in the Remote port and type your custom RDP Port (I am currently using port 1050 for this tutorial) then click Next
Insert the port you want open, in this case, it is 2025
You can now specify if this rule applies to local IPs or Remote. (I will be leaving this blank so I can access the server from anywhere through the specified port)
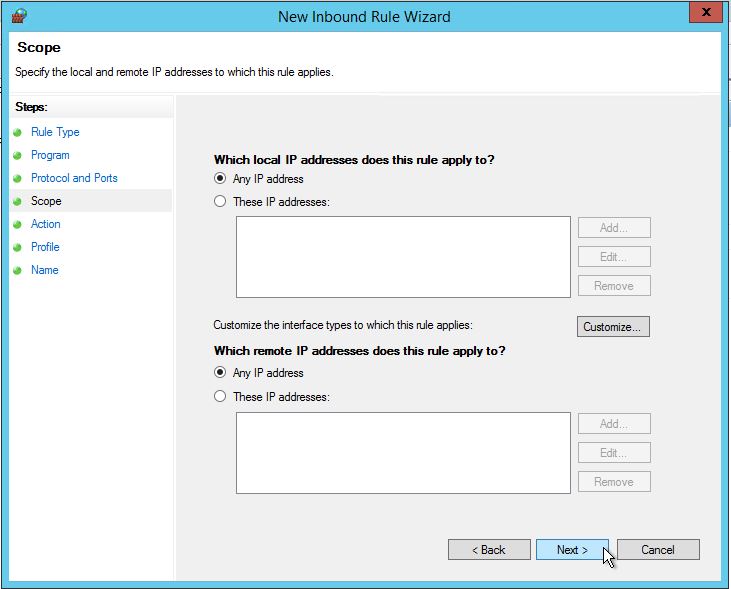
Choose the IP’s you want allowed or blocked. In this case, we are keeping everything open.
You can leave the default or select your action and click Next
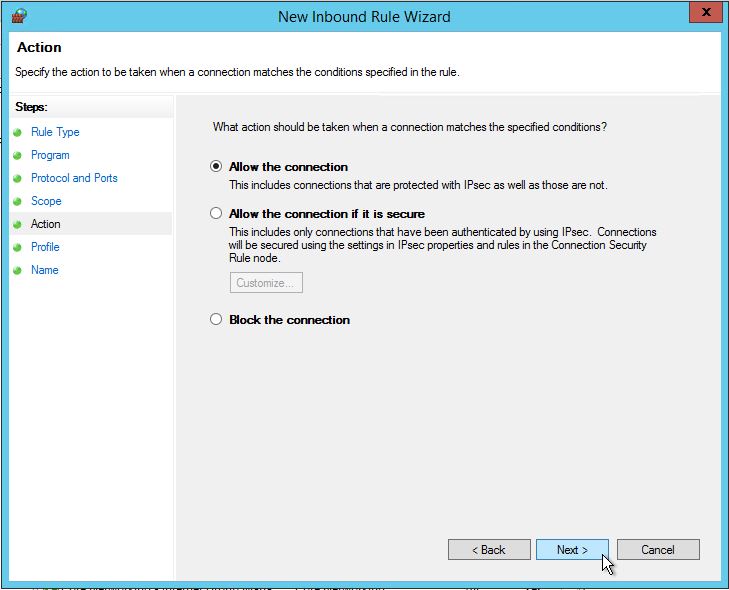
Choose Allow the connection
You can allow this rule to Domain, Private, and Public or you can specify accordingly.
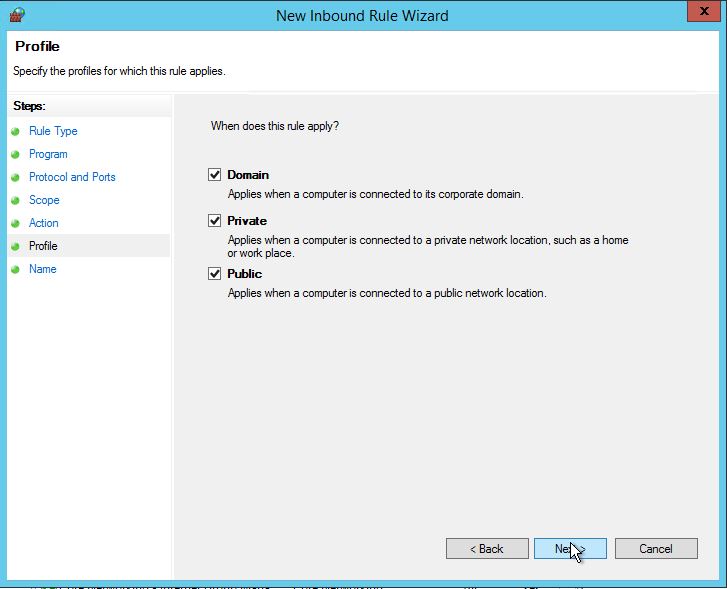
Choose profiles that you want the rule to use. In this case all.
Type the Name of your rule and you can give it a description if you want, the click Finish.
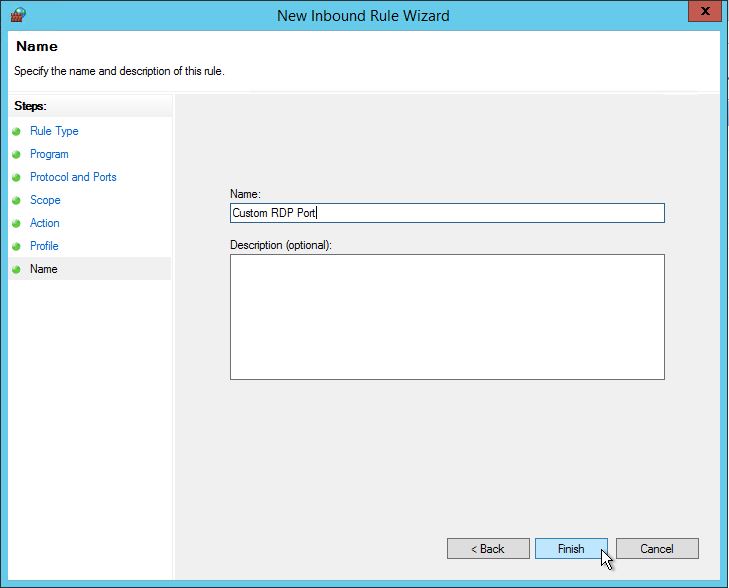
Name your rule
You will now see that rule on the top of your list.
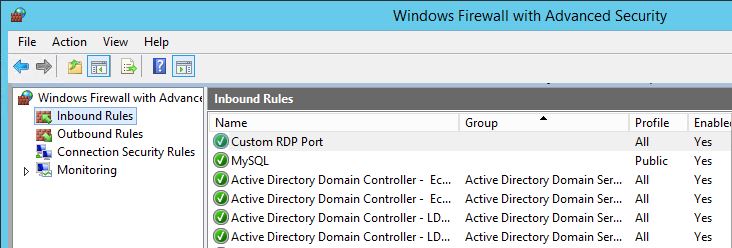
You can now see your custom rule
Now Reboot the machine (vps or dedicated server)
Thanks
webanchor Support Team
https://www.webanchor.net
